Regime da Margem de Lucro
O Regime de IVA por Margem de Lucro está previsto na lei para Galerias de Arte, Bens em 2ª mão, etc.
-
Regime da margem de lucro – Bens em segunda mão
-
Regime da margem de lucro – Objetos de arte
-
Regime da margem de lucro – Objetos de coleção e antiguidades
-
Regime da margem de lucro – Agências de viagens
O Gestix foi o primeiro software de faturação certificado a tratar esta modalidade de IVA sendo um sistema ERP CRM bastante completo e versátil.
Como funciona o regime especial de IVA por margem de lucro?
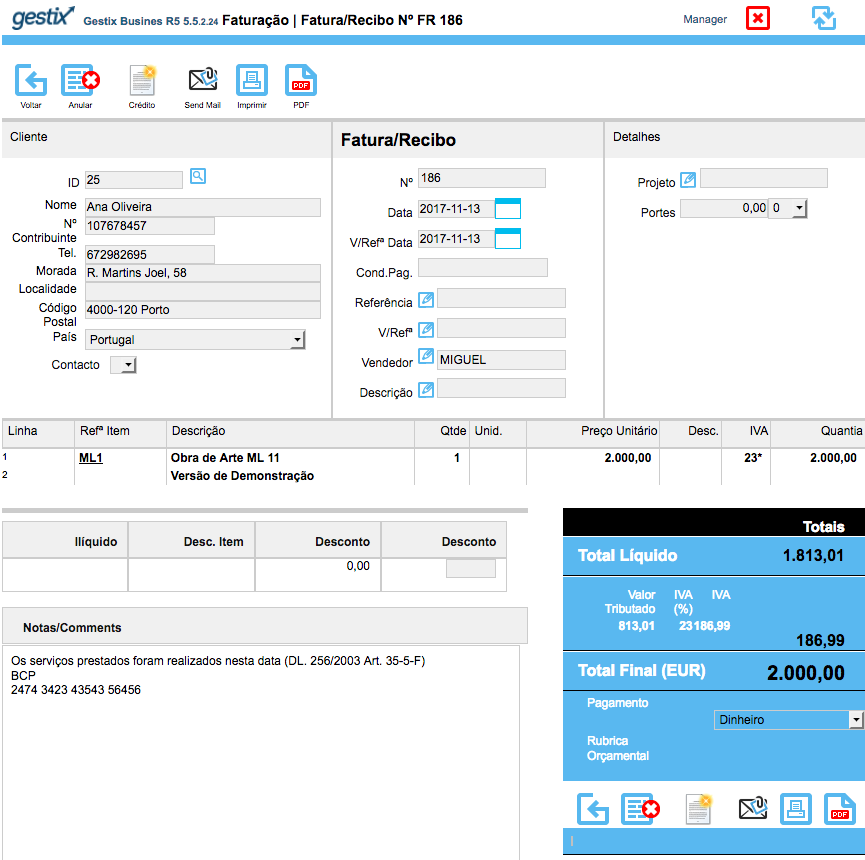
Ao optar por este regime, o artigo está na mesma sujeito a IVA mas o mesmo não é apresentado na fatura, não dando direito a dedução.
O Regime de IVA de Margem de Lucro – Bens em Segunda Mão permite que empresas que comercializam bens usados, objetos de arte, antiguidades e colecionáveis paguem o IVA apenas sobre a margem de lucro e não sobre o valor total da venda. Esse regime é especialmente útil para revendedores que adquirem bens de particulares ou de entidades sem direito à dedução do IVA.
Passos para Utilizar o Regime de IVA de Margem de Lucro
1. Verificar a Elegibilidade
Este regime pode ser aplicado a:
• Bens em segunda mão (ex.: automóveis usados, móveis, eletrônicos).
• Objetos de arte, antiguidades e bens de coleção.
• Bens adquiridos a:
• Particulares.
• Empresas sem direito à dedução do IVA.
• Outros sujeitos passivos que já aplicaram o regime de margem.
2. Registar-se no Regime (se aplicável)
• Na maioria dos casos, não é necessário um registo formal para aplicar o regime, mas deve ser mencionado na contabilidade e nas faturas.
• Certifique-se de que sua atividade está devidamente enquadrada no Código CAE apropriado.
3. Emissão de Faturas
• A fatura deve indicar explicitamente que o regime de margem foi aplicado. Utilize menções como:
• “IVA – Regime de Margem – Bens em Segunda Mão”
• “IVA – Regime de Margem – Objetos de Arte” (caso aplicável)
• Não pode discriminar o IVA na fatura (ele já está embutido na margem).
4. Cálculo do IVA
O IVA incide somente sobre a margem de lucro, e não sobre o valor total da venda. Existem dois métodos:
1. Regime de Margem Global (mais comum)
• Calcula-se o IVA sobre a margem global obtida num determinado período (por ex., mensalmente).
• Fórmula:
Margem Tributável = Total das Vendas – Total das Compras
IVA a pagar = Margem Tributável × Taxa de IVA aplicável (ex.: 23% em Portugal)
2. Regime de Margem Individual
• Calcula-se o IVA individualmente para cada bem vendido.
• Fórmula:
Margem Tributável = Preço de Venda – Preço de Compra
IVA a pagar = Margem Tributável × (Taxa IVA / (1 + Taxa IVA))
(Exemplo para taxa de 23%: IVA = Margem × 18,7%)
5. Contabilidade e Declaração do IVA
• O IVA devido deve ser reportado na Declaração Periódica de IVA.
• Deve manter um registo claro das compras e vendas para fins fiscais.
Exemplo Prático
• Compra um telemóvel usado por 200€ a um particular.
• Revende por 300€.
• Margem: 300€ – 200€ = 100€.
• IVA devido (à taxa de 23%): 100€ × 18,7% = 18,70€.
Este regime pode ser vantajoso para revendedores, pois reduz a carga fiscal e torna os produtos mais competitivos no mercado.
Mais informação: Guia Regime de IVA de Margem de Lucro
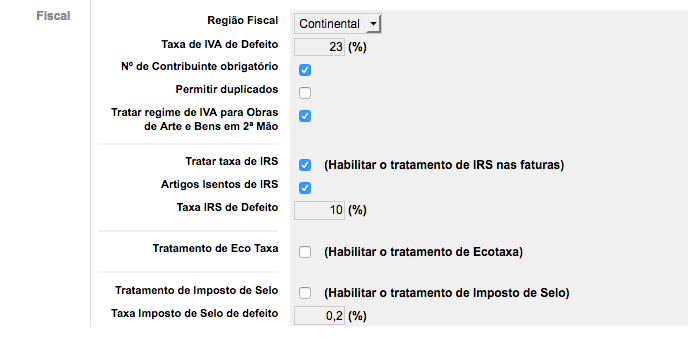
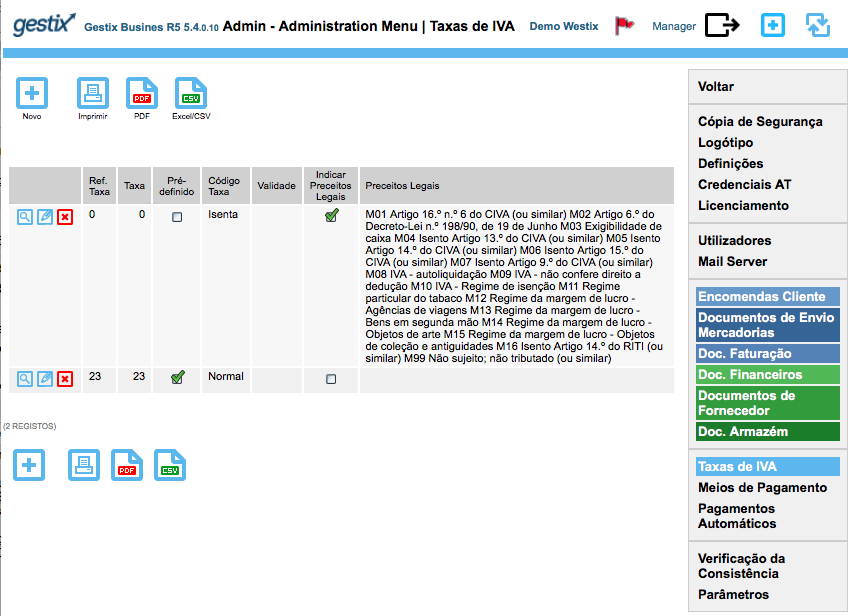
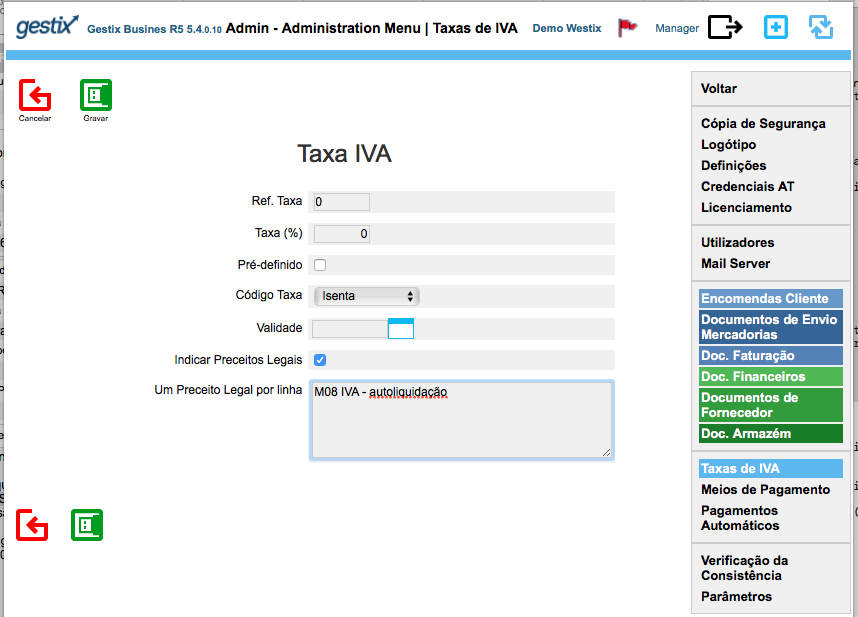
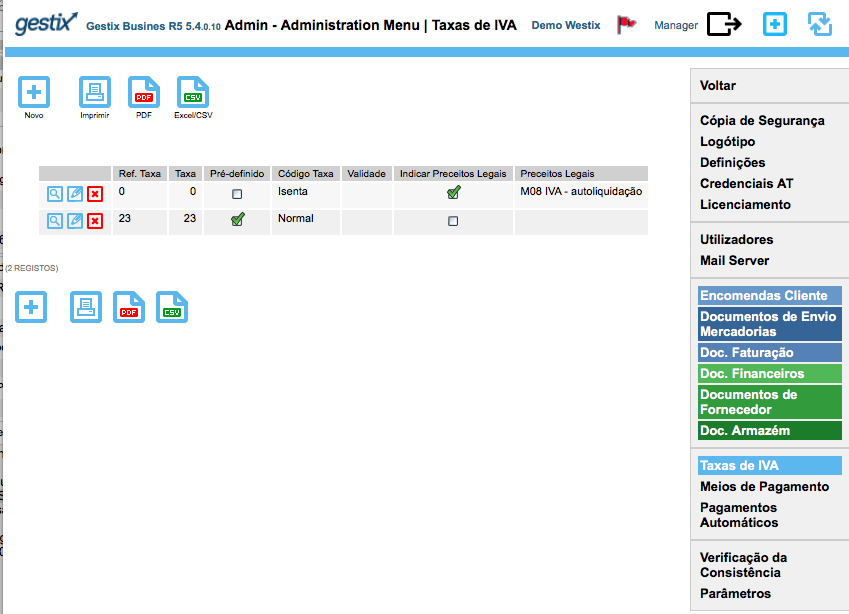
No menu Admin / Definições, entre as várias opções de ordem fiscal, encontra-se a possibilidade de habilitar o regime especial, colocando um visto no campo “Tratar regime de IVA para Obras e Arte e Bens em 2ª Mão”. Esta opção é comum às restantes situações de Regime de Margem de Lucro.