This example shows how to use the Gestix ERP CRM to generate invoices from CSV files in a custom format.
The first section focus on the routinely operation of importing a CSV file and generating invoices from it. The last section focus on the initial set up that is to be performed only once for a given CSV layout.
We assume all data supplied to the system comes from the CSV file. In the process, when the customer doesn’t exist in the file, it is created. Otherwise it is updated if their details have changed since previous import. The same behavior applies to products (stored in the Articles file) and to services (stored in the Services file).
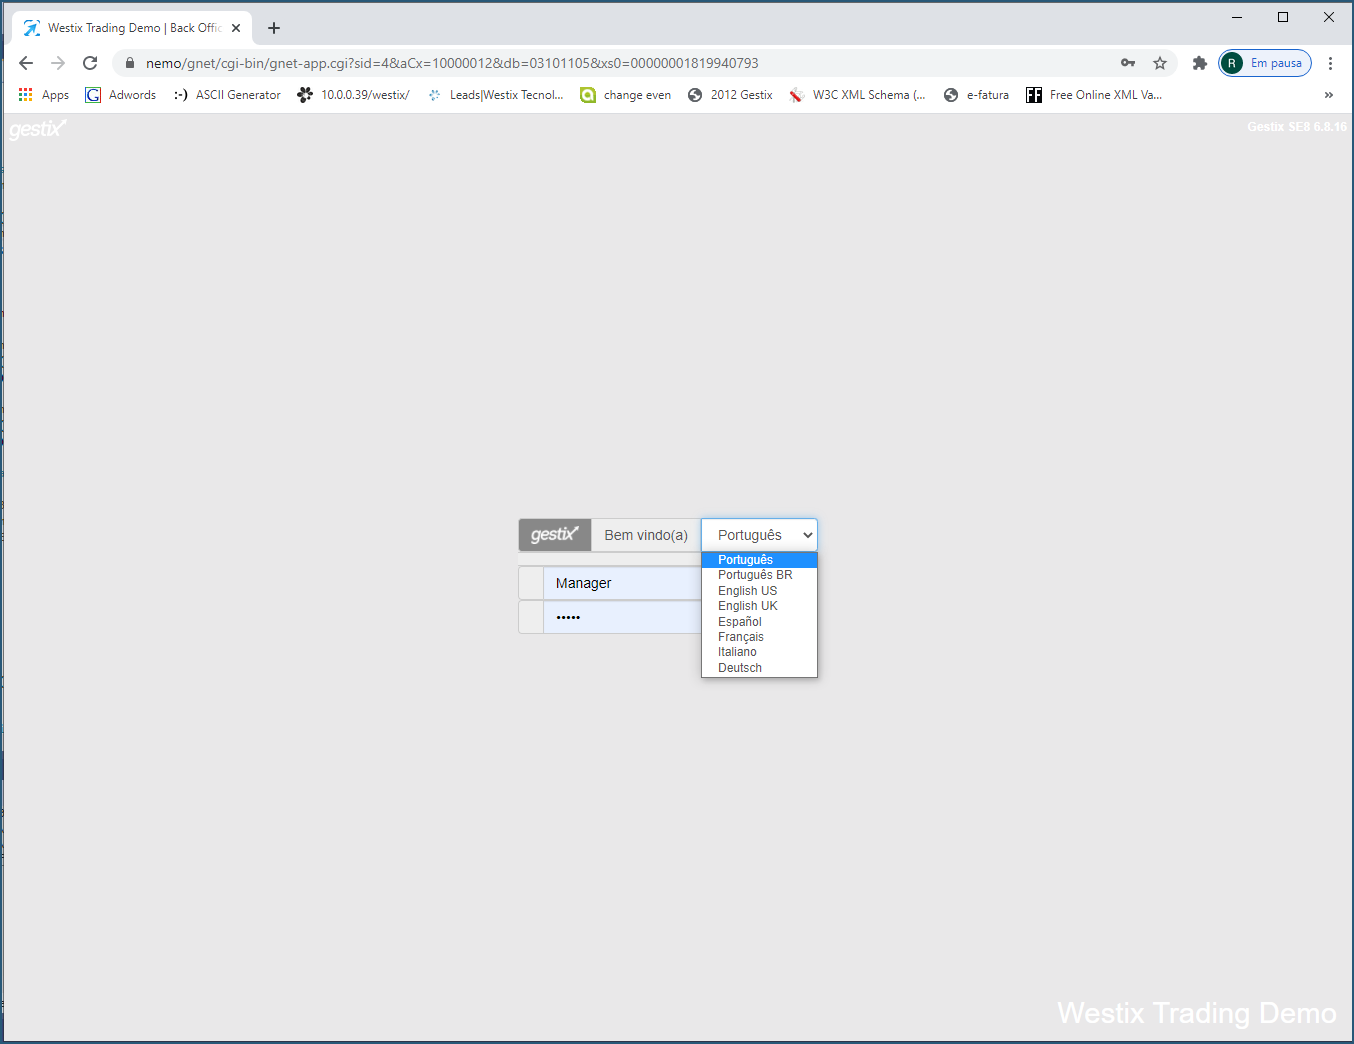
Note: the user interface language inside Gestix is independent of the language of the produced invoices. Users can as well choose the language in which to print the invoices at the time they print or store the pdf.
Routinely Import Invoices
Gestix ERP CRM is available for European counties as well as for non European countries. Some countries, including Portugal, require the invoicing software to provide the SAF-T xml file reported to the Tax Authority. This particular setup is for a company subject to Portuguese Tax Authority rules. In this case, invoices are to be issued in two steps:
- Phase 1, load the CSV into the system producing a batch of proforma invoices;
- Phase 2, generate a batch of final invoices from the outstanding proforma invoices imported in phase 1.
Phase 1: Import the CSV file
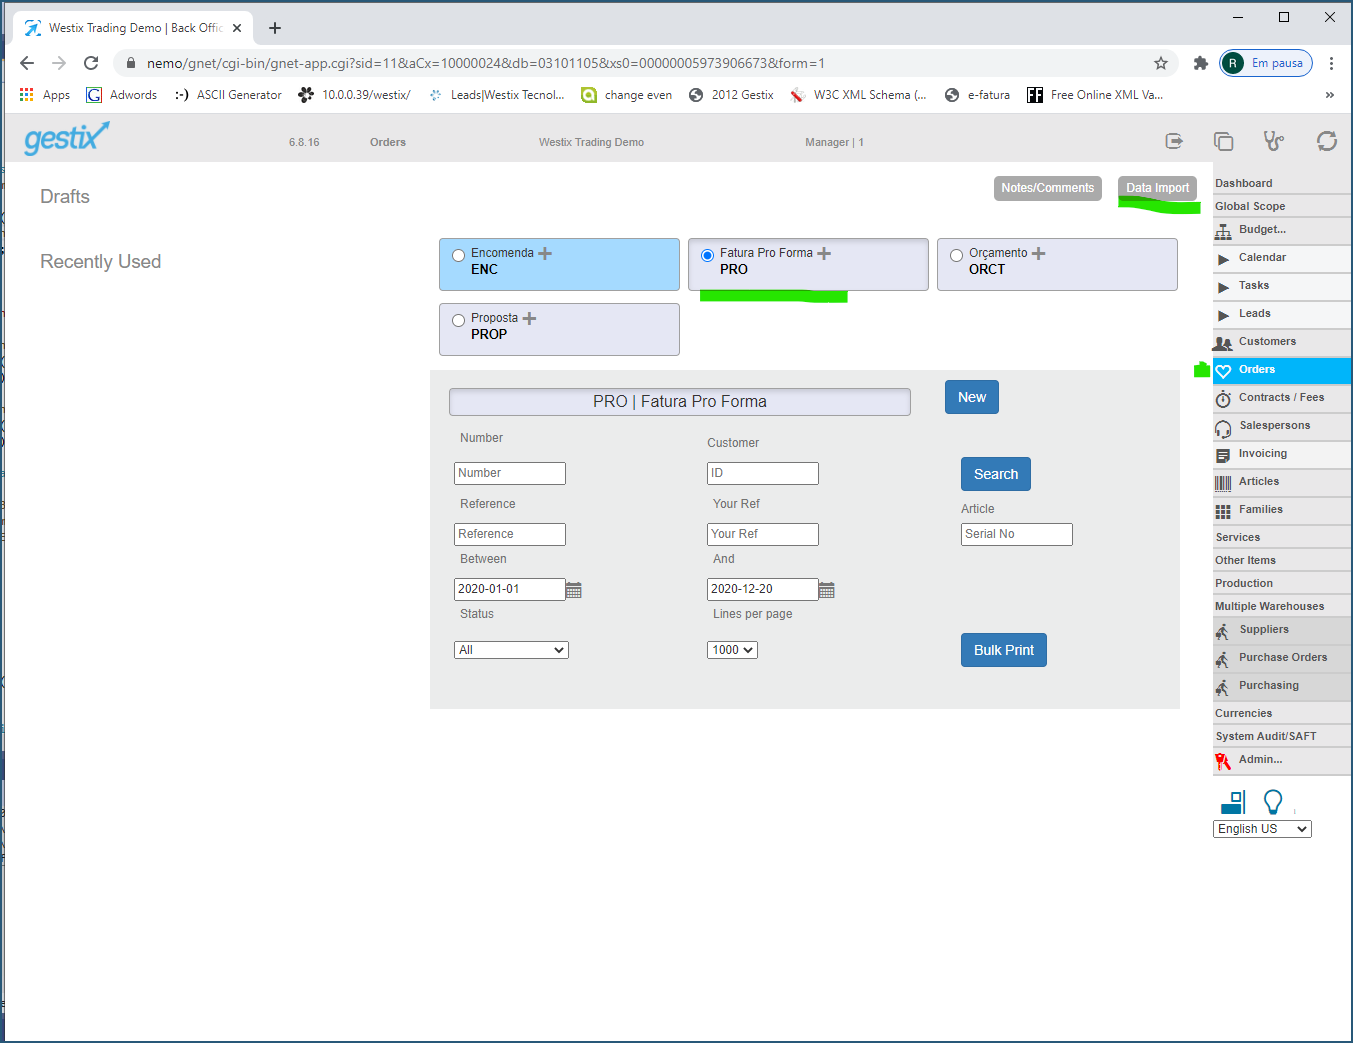
Enter the Orders menu and select Proforma Invoice. Then click on Data Import.
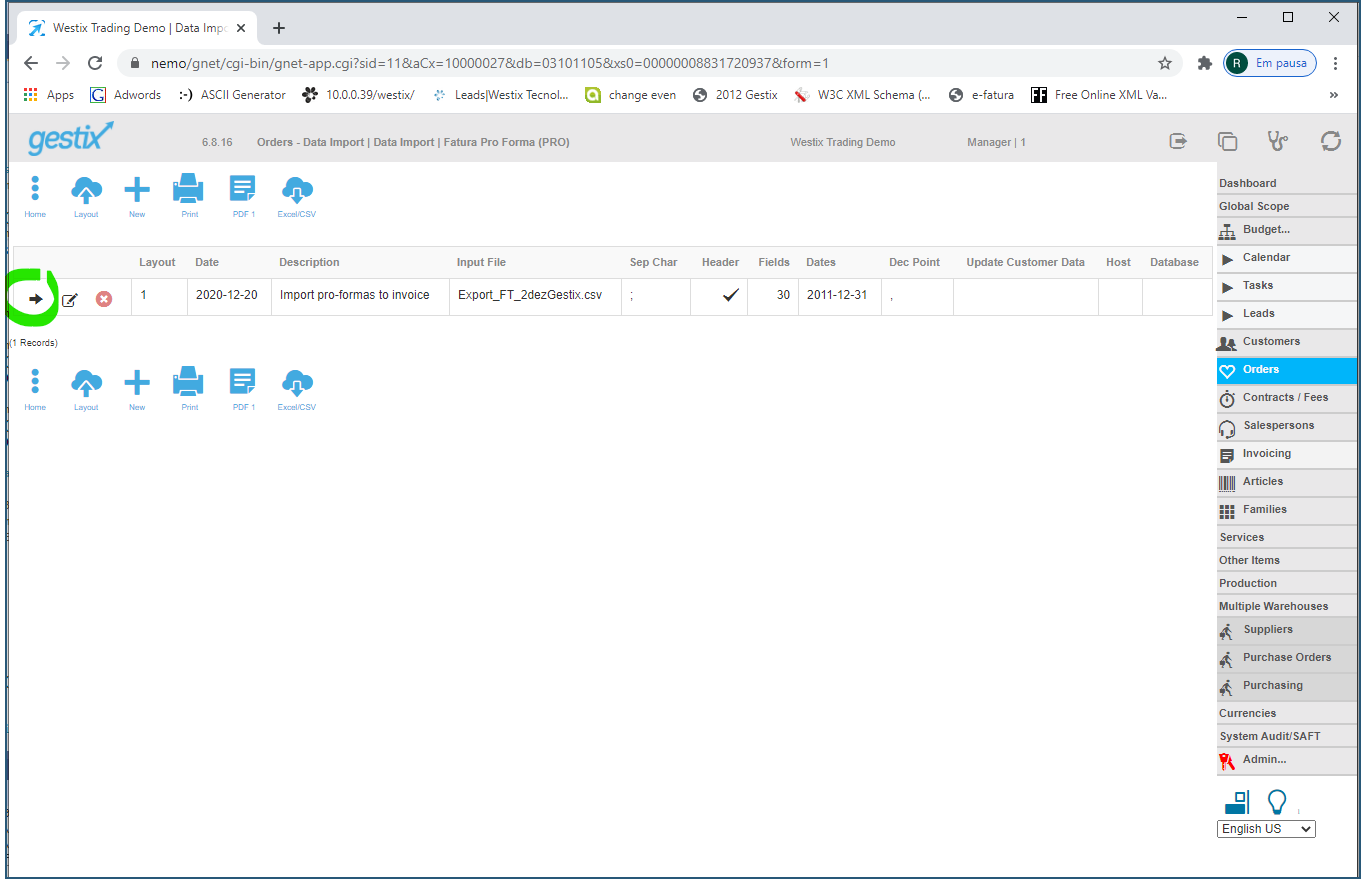
Select a CSV layout pressing the arrow next to its description.
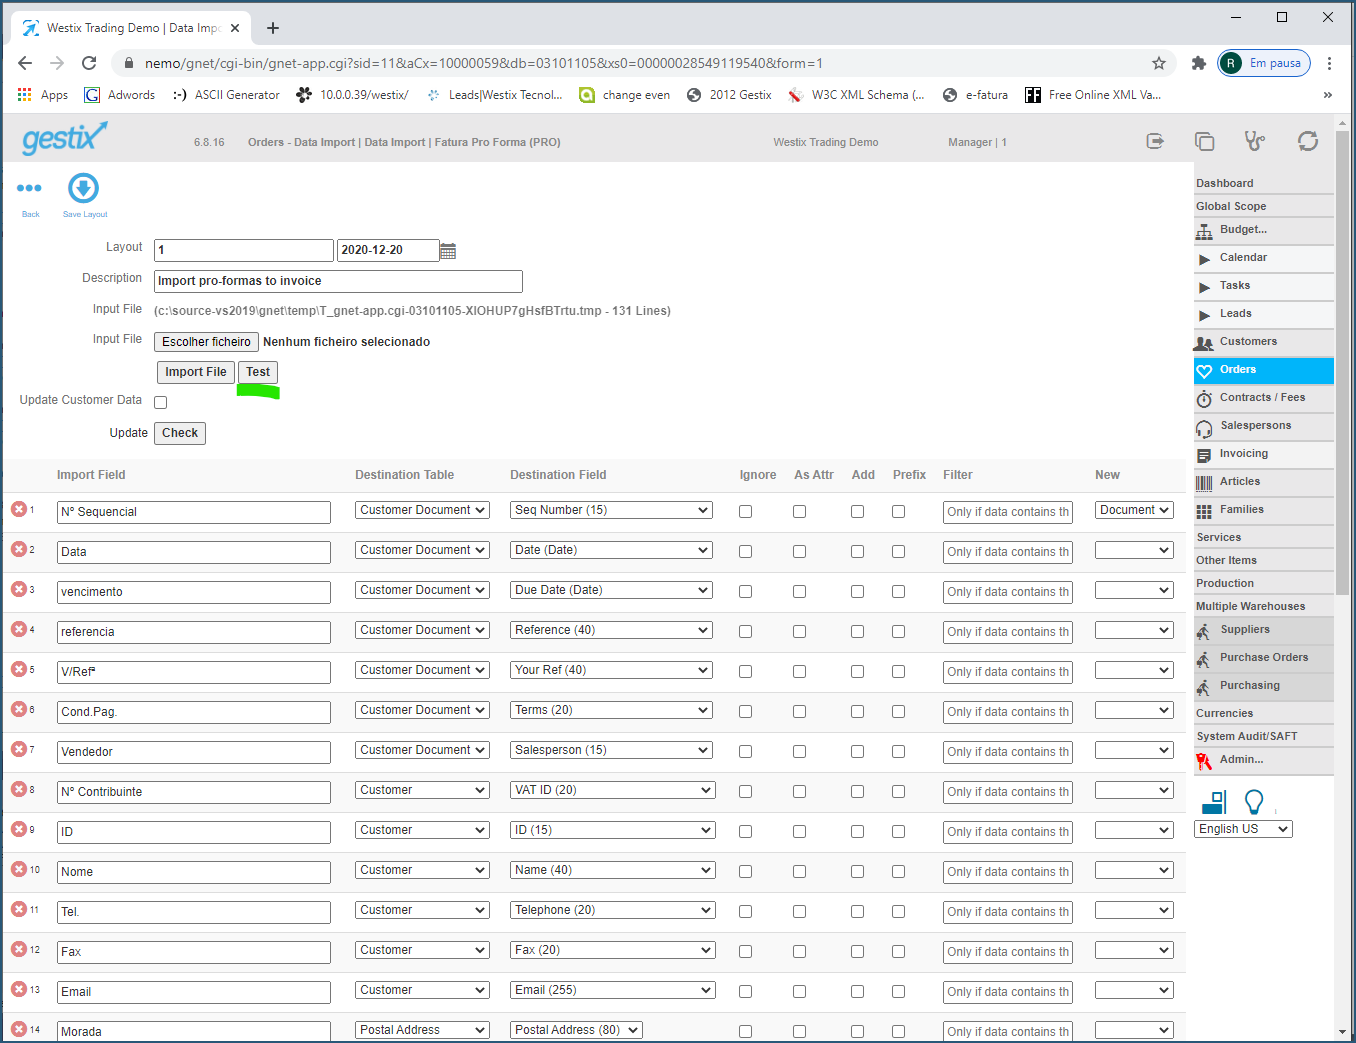
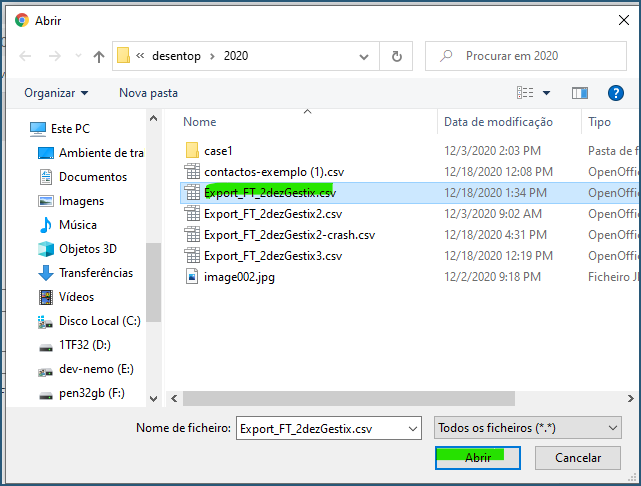
Press the Choose File button to upload the CSV file for the current batch.
Press the Test button to preview the documents before they are stored on to the system.
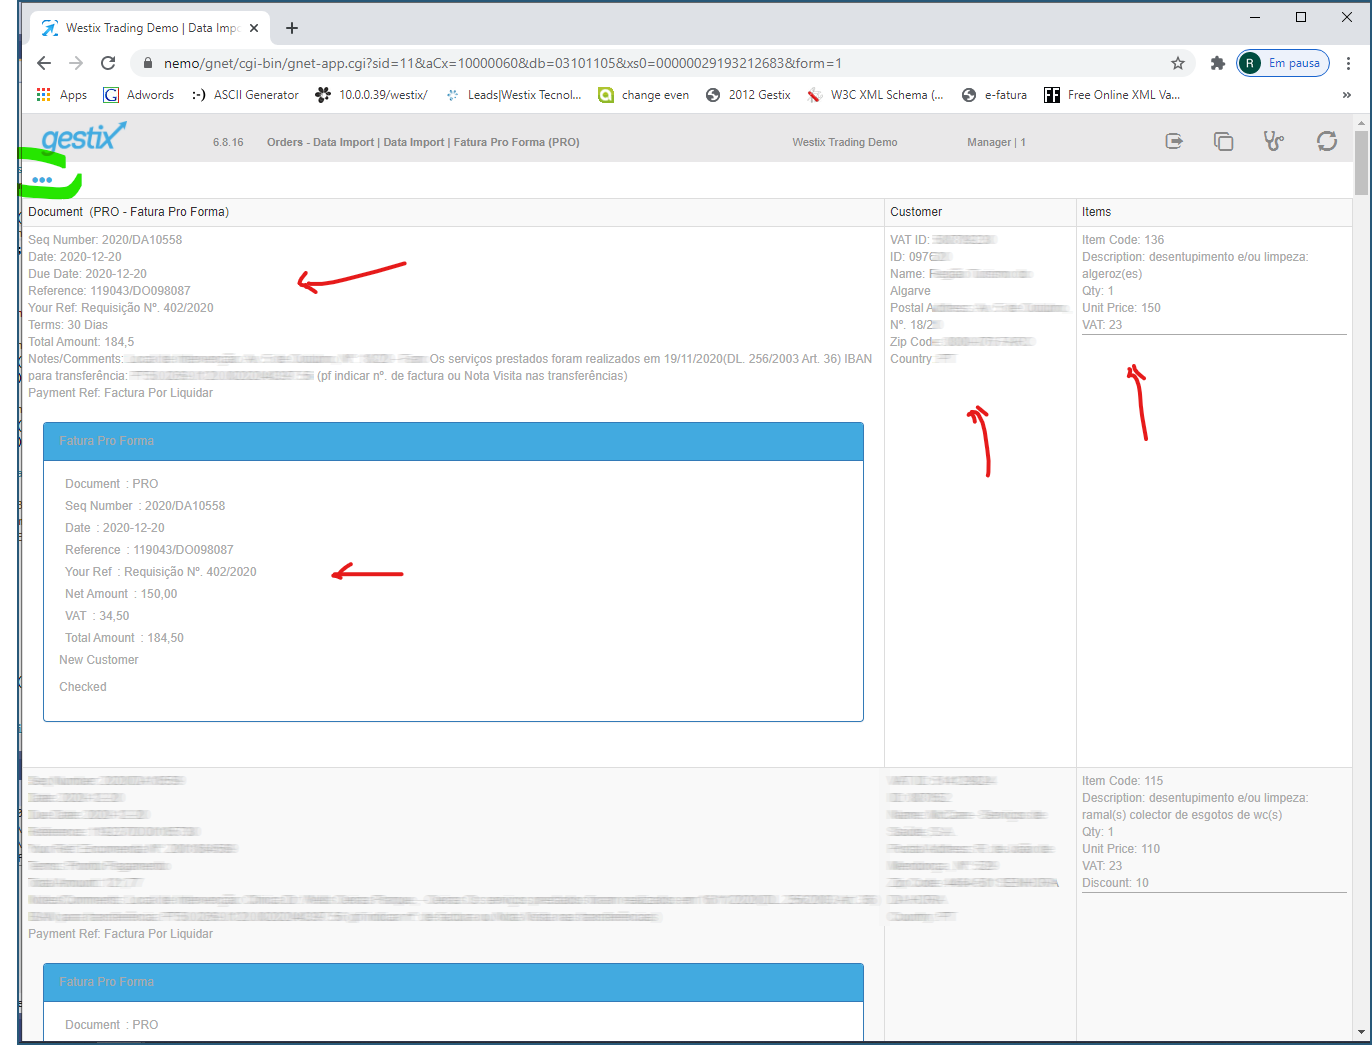
Press Back when ready.

Finally press the Import File button. Allow some time for the process to complete.
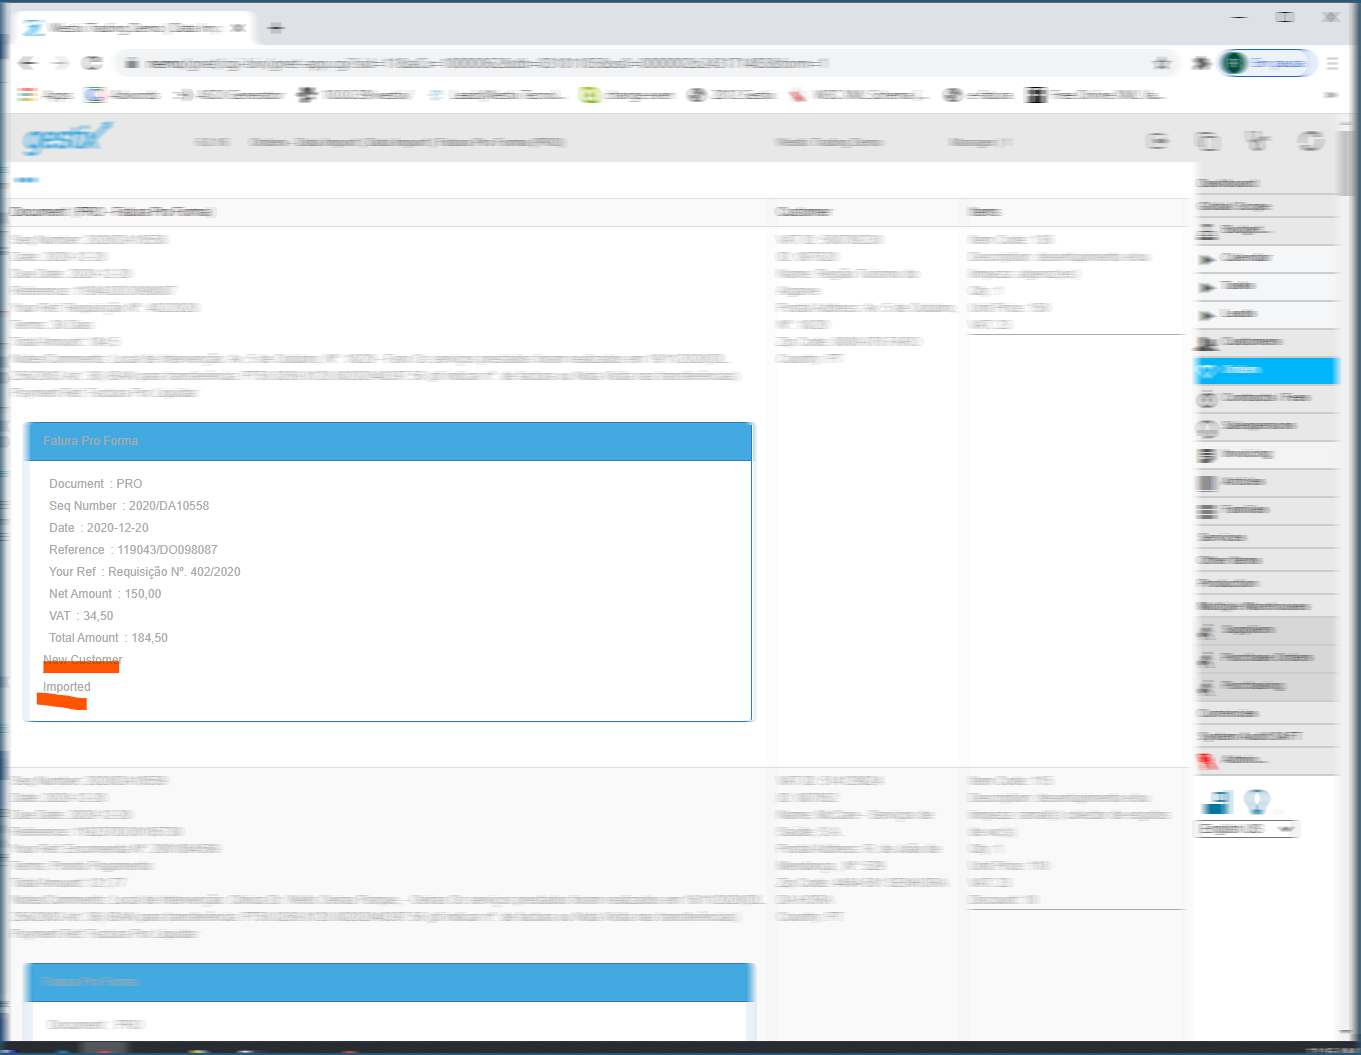
Then the report of stored documents is shown. If an error occurs during the processing of each document it will be noticed in this report.
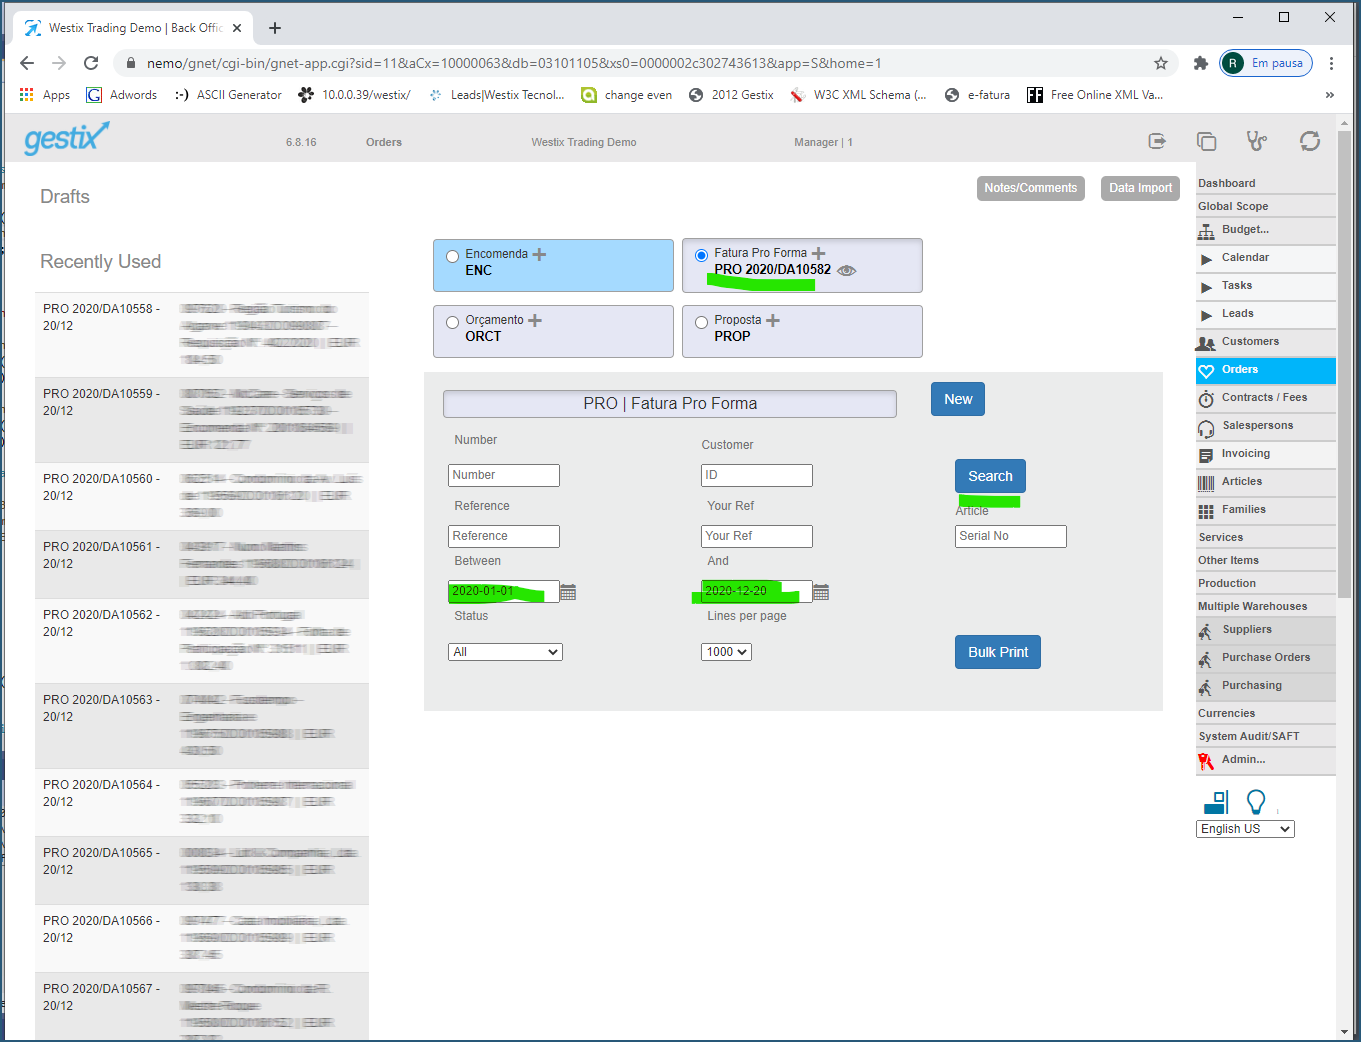
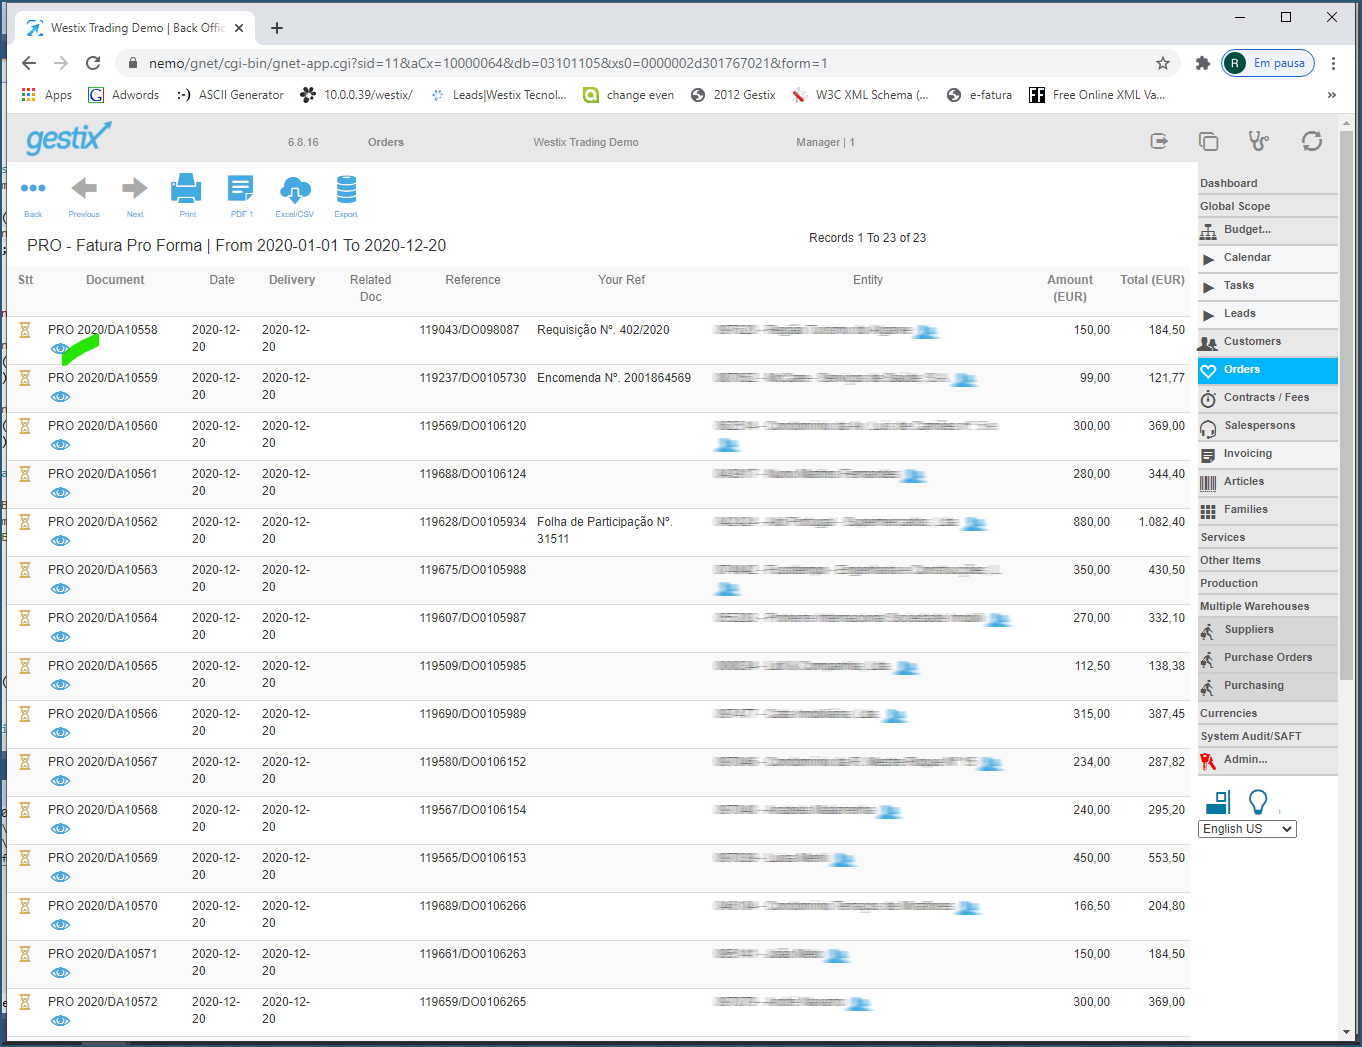
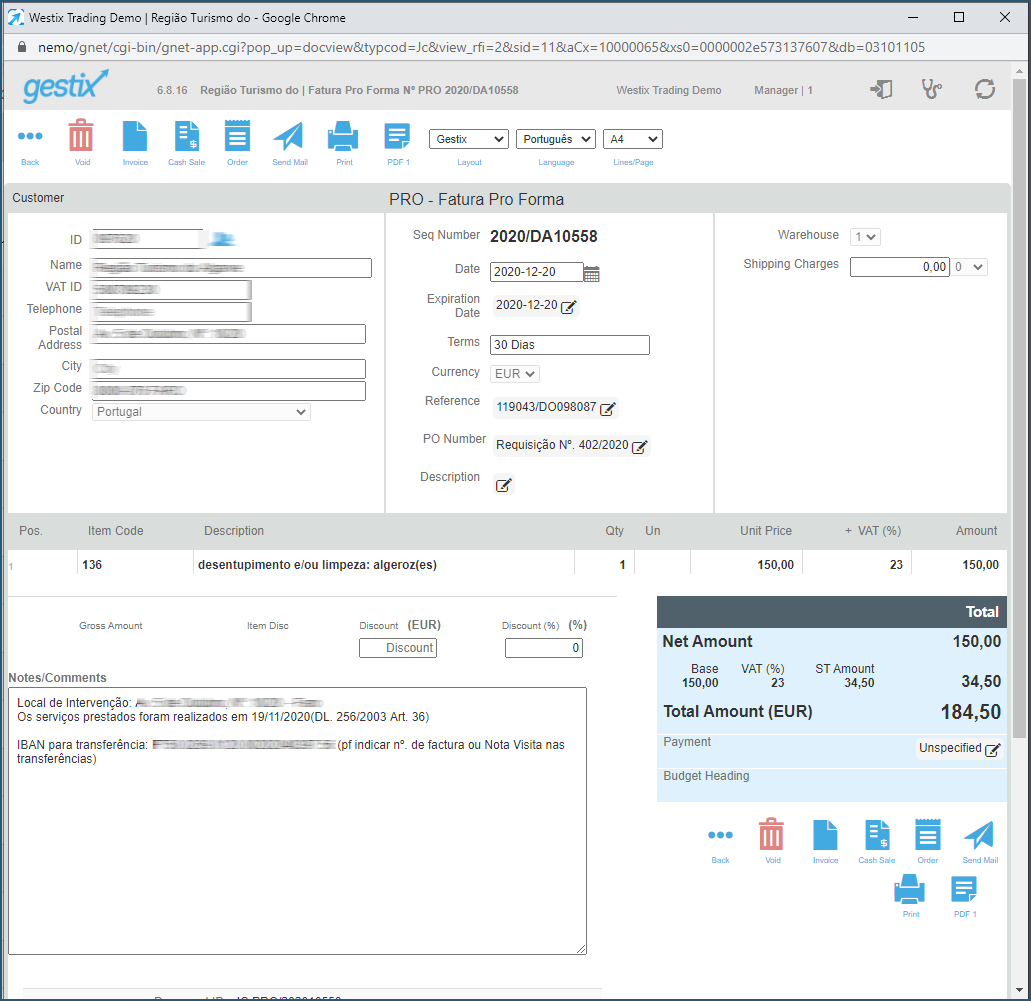
Click the Search button to list the imported documents.
Phase 2: Generate the Invoices
Enter the Invoicing menu and open the Report tab.
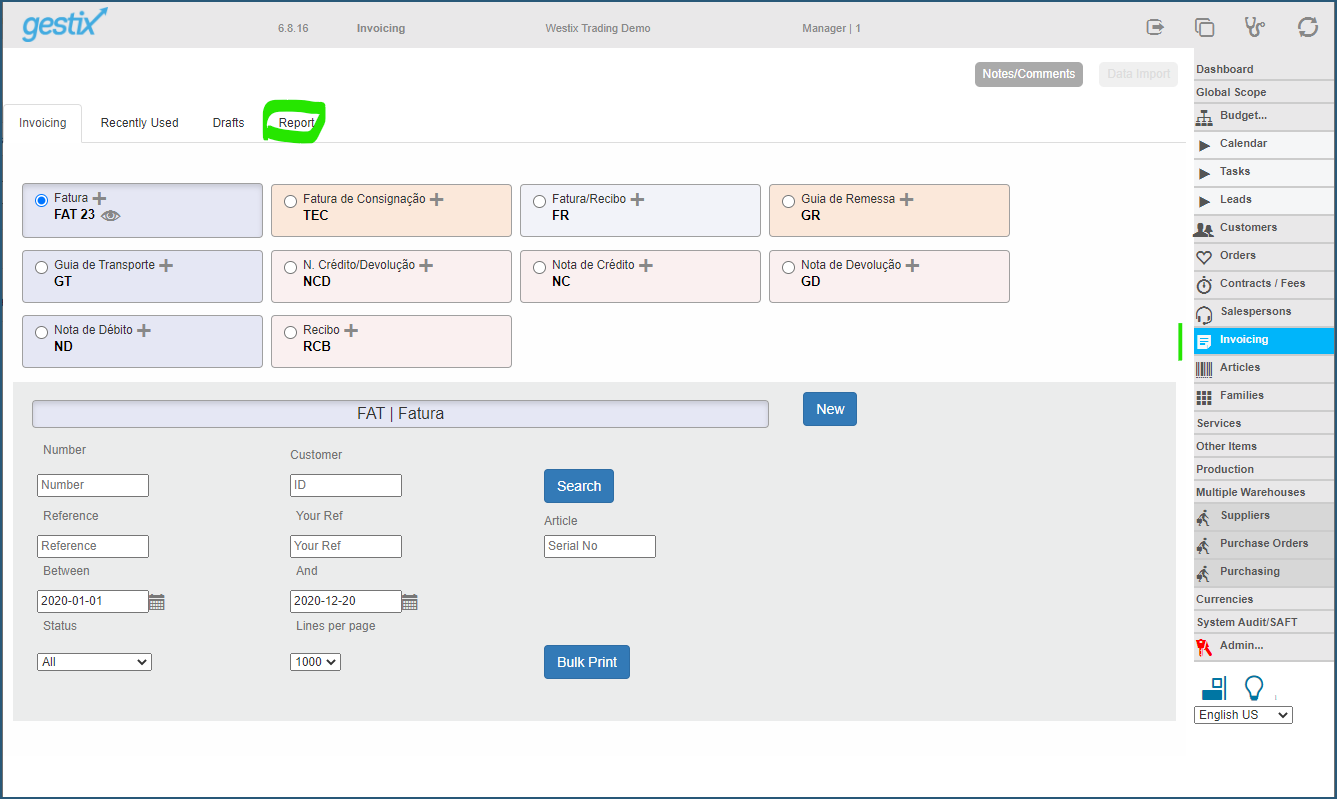
Press the Automatic Billing By Document button.
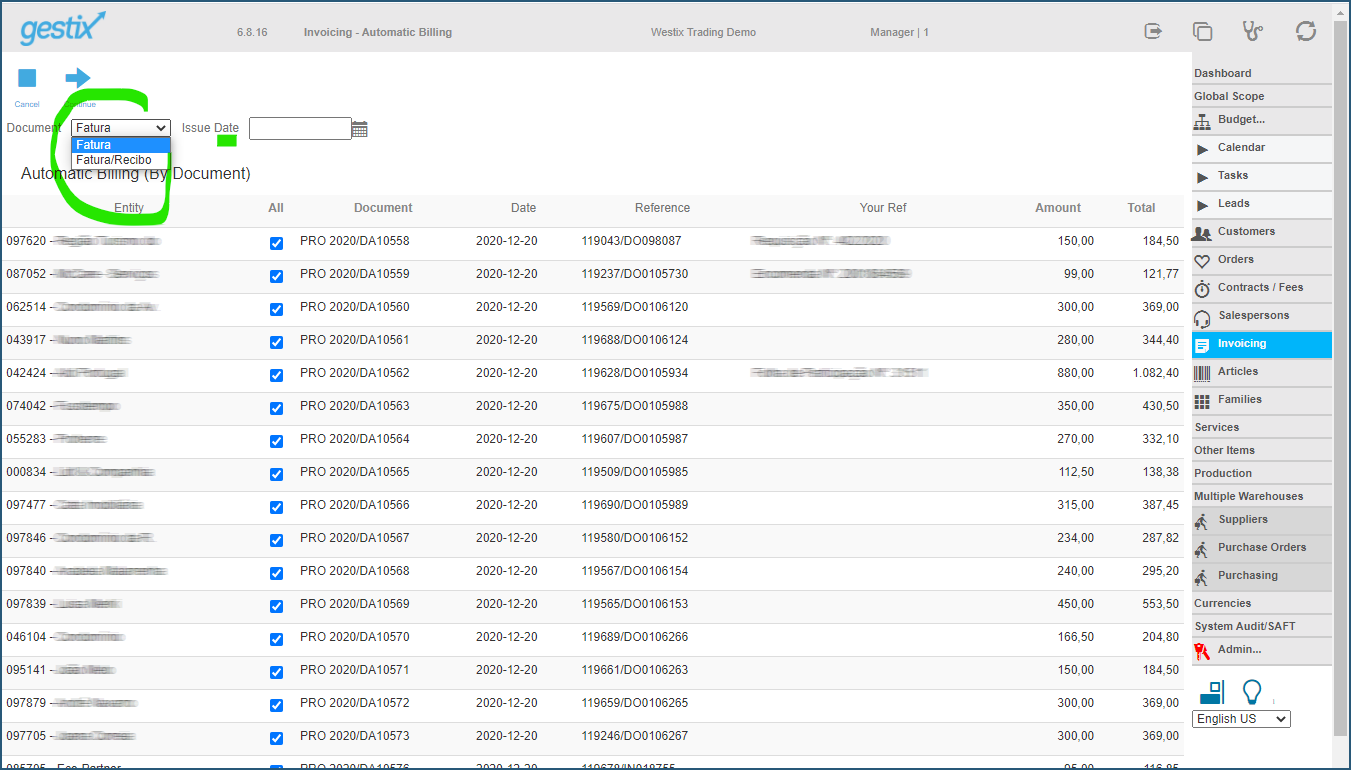
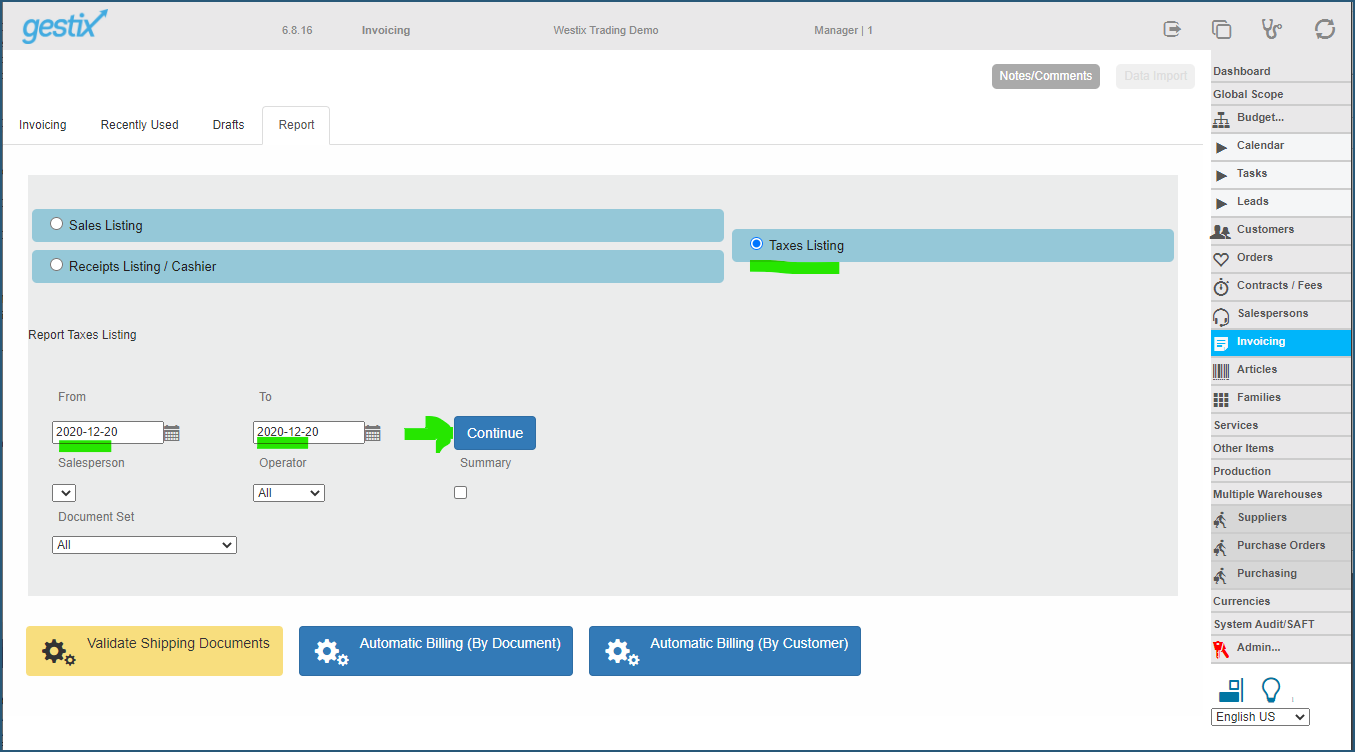
Select the Document Set for the invoices to be generated. You can specify the Invoice Date as well (current date assumed by default). At this point you can also control which invoices to process by checking or unchecking each line.
Press the Continue button to proceed to the confirmation page.
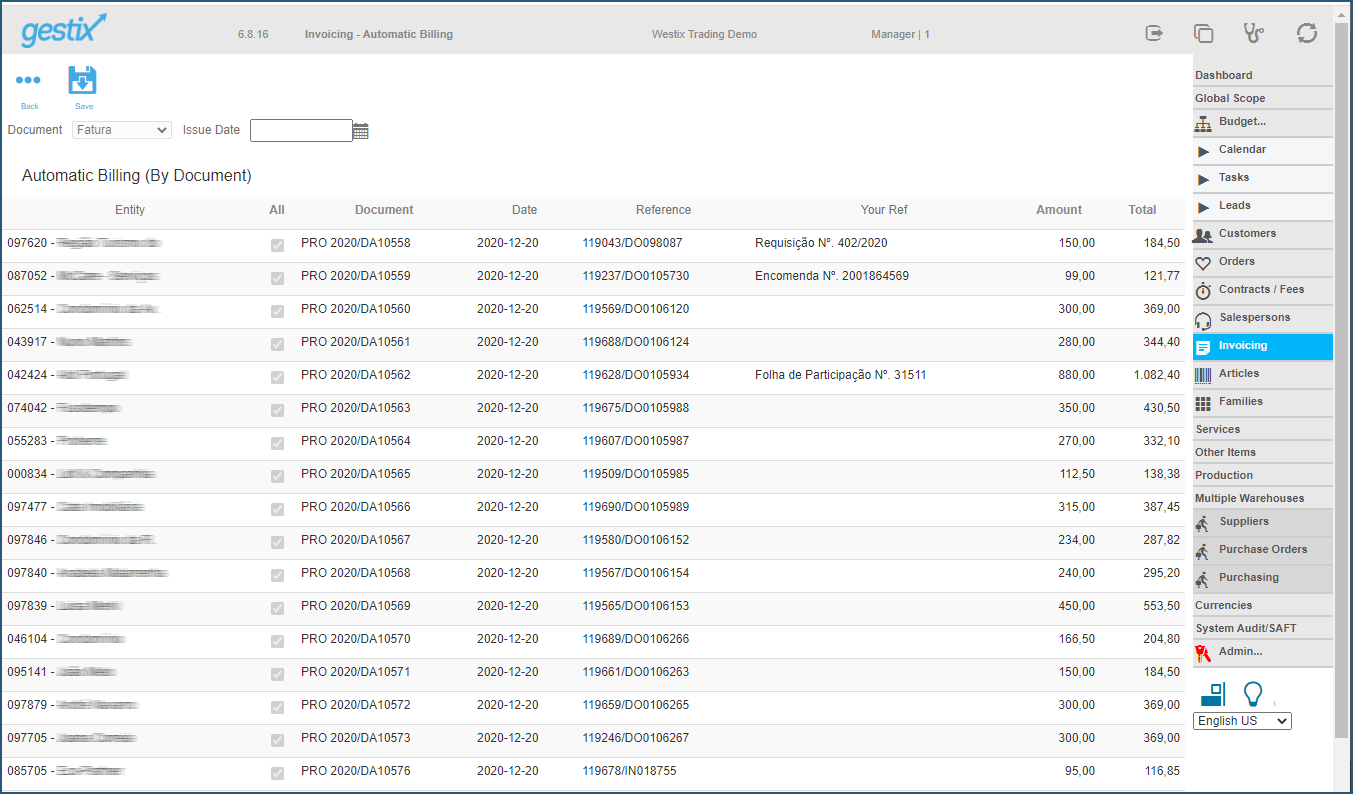
Finally, confirm the operation by pressing Save.
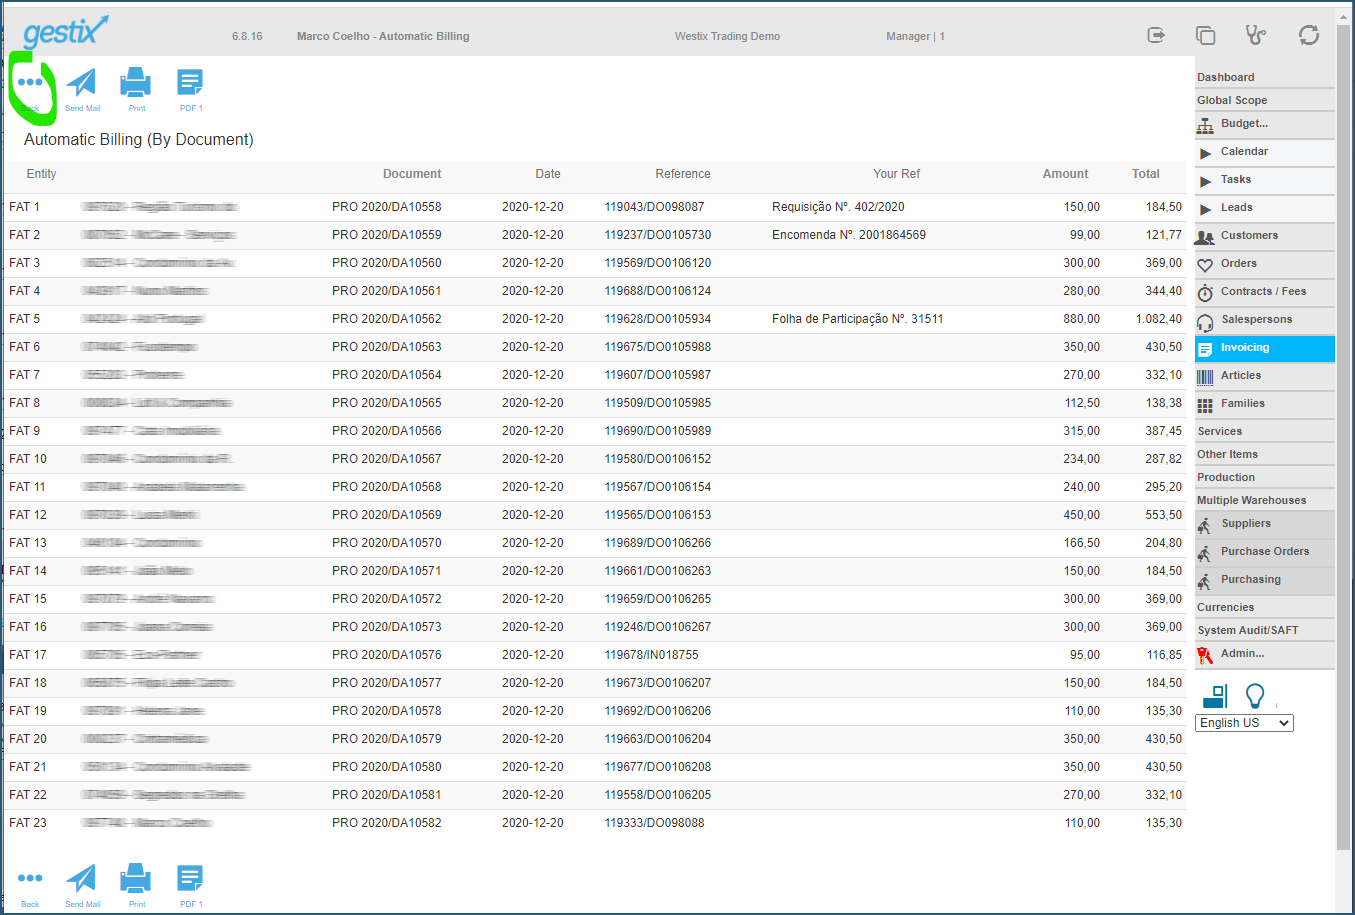
You can find your newly created invoices in the following Fiscal Report.
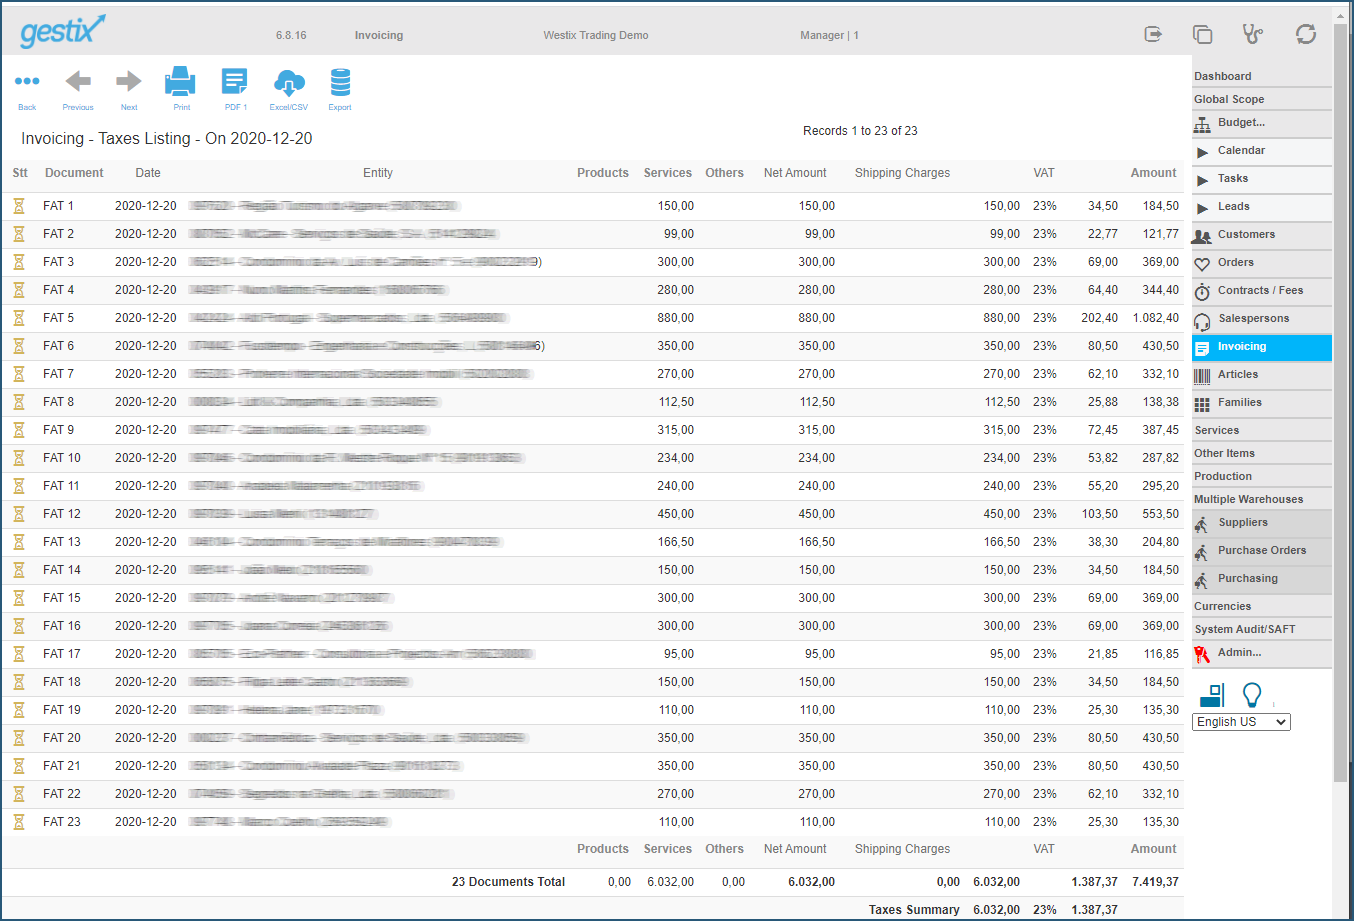
The overall process terminates at this point.
Initial setup – Define the CSV layout
The first line of the CSV is expected to contain column headings. Each line in the source invoice is represented by a line in the CSV file. If the invoice has three lines, for instance, there will be three lines in the CSV file will all column data repeated except for the columns related to the items.
- Customer data (number, name, billing address, shipping address, VAT ID number, etc.)
- Invoice header data (invoice number and date, etc.)
- Item data (product code, description, quantity, unit price, etc.)
The Item Status Type field allows for telling Gestix whether the item is to be considered an Article (P), a Service (S), or plain Text (T). If the item code is not supplied the item is assumed to be stored as plain text.
Note: you don’t need to go through this steps each time you want to import invoices. Generally this task is required only once, on initial setup.
Sample CSV File for this example (extra blank lines added for clarity):
“Nº Sequencial”;”Data Fatura”;”Data Vencimento”;”Referencia”;”V/ Refª”;”Cond. Pag.”;”Vendedor”;”Nº Contribuinte”;”Código Cliente”;”Nome”;”Telefone”;”Fax”;”Email”;”Morada”;”Morada 2″;”Código Postal”;”Pais”;”Desconto”;”Total Final”;”Notas/ Comentários”;”Refª Item”;”Descrição”;”Qtde”;”Unidade”;”Preço Unitário”;”IVA”;”Desconto1″;”Desconto2″;”Ref. Pagamento”;”Status Item Type”
“2020/DA10562″;”02-12-2020″;”01-01-2021″;”119628/DO0105934″;” Folha de Participação Nº. 31511″;”30 Dias”;;506819523;1111;”WESTIX”;;;;”RUA LUIS CAMOES 32″;;”2130-062 BENAVENTE”;”PT”;0;”1082,4″;”Local de Intervenção: R. José Nº. 1 Lj.
Os serviços prestados foram realizados em 30/11/2020(DL. 256/2003 Art. 36)
IBAN para transferência: PT50 xxx 34333 YYYYY (pf indicar nº. de factura ou Nota Visita nas transferências)”;149;”desentupimento e/ou limpeza: rede geral de esgotos residuais e/ou pluviais”;1;;880;23;0;0;”Factura Por Liquidar”;”S”“2020/DA10562″;”02-12-2020″;”01-01-2021″;”119628/DO0105934″;” Folha de Participação Nº. 31511″;”30 Dias”;;506819523;1111;”WESTIX”;;;;”RUA LUIS CAMOES 32″;;”2130-062 BENAVENTE”;”PT”;0;”1082,4″;”Local de Intervenção: R. José Nº. 1 Lj.
Os serviços prestados foram realizados em 30/11/2020(DL. 256/2003 Art. 36)
IBAN para transferência: PT50 xxx 34333 YYYYY (pf indicar nº. de factura ou Nota Visita nas transferências)”;;”Serviços de Limpeza”;;;;;;0;”Factura Por Liquidar”;”T”“2020/DA10562″;”02-12-2020″;”01-01-2021″;”119628/DO0105934″;” Folha de Participação Nº. 31511″;”30 Dias”;;506819523;1111;”WESTIX”;;;;”RUA LUIS CAMOES 32″;;”2130-062 BENAVENTE”;”PT”;0;”1082,4″;”Local de Intervenção: R. José Nº. 1 Lj.
Os serviços prestados foram realizados em 30/11/2020(DL. 256/2003 Art. 36)
IBAN para transferência: PT50 xxx 34333 YYYYY (pf indicar nº. de factura ou Nota Visita nas transferências)”;;”Deslocação para o local de intervenção”;;;;;;0;”Factura Por Liquidar”;”T”
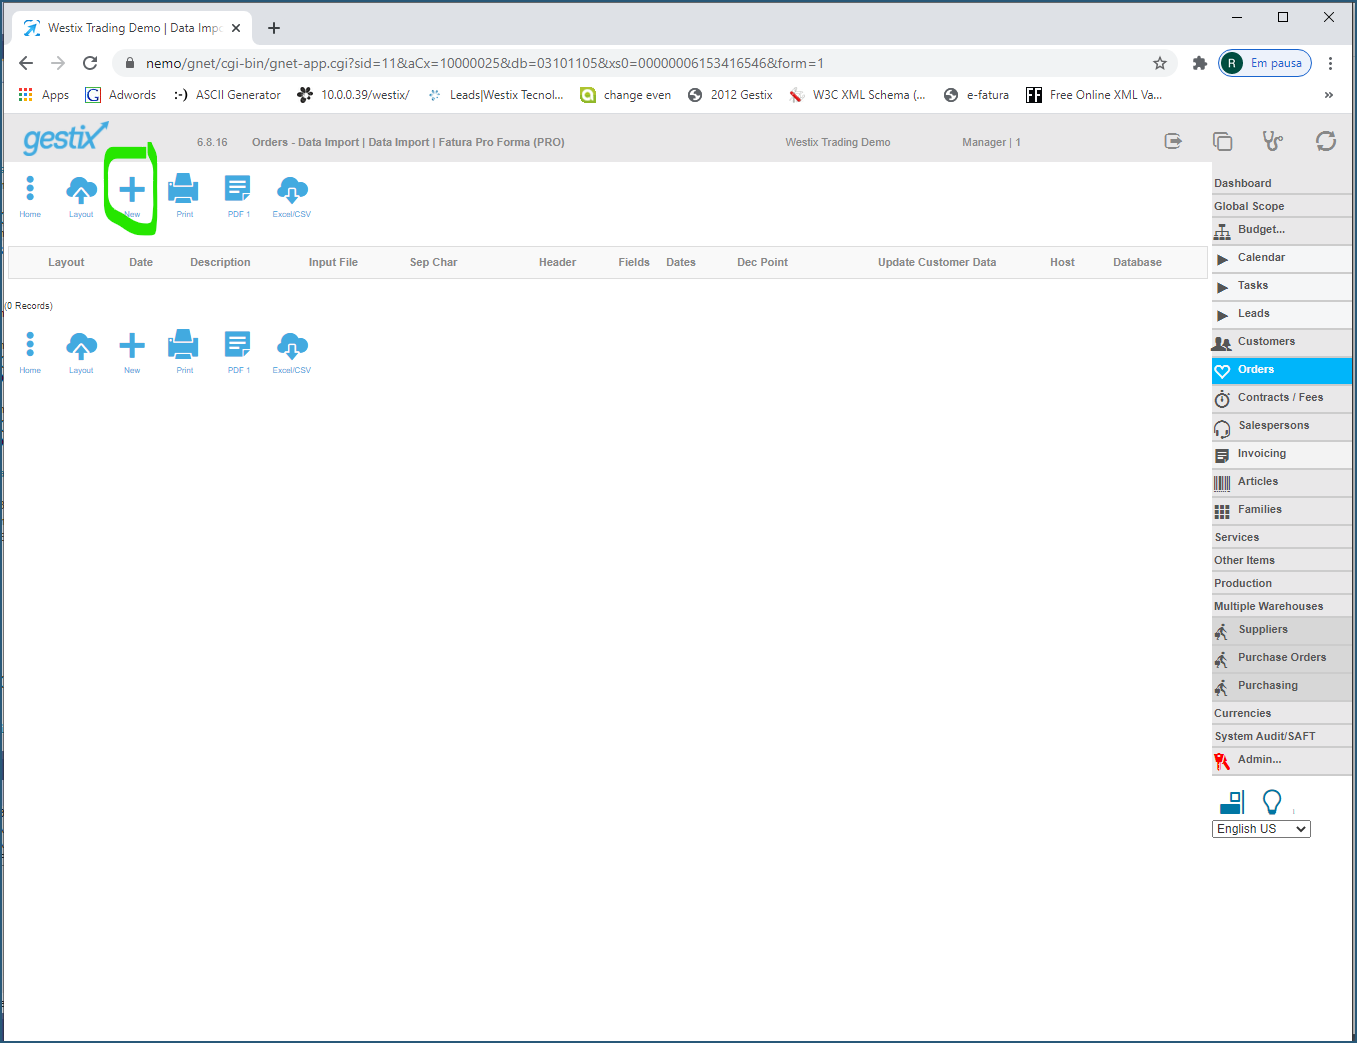
Enter the Orders menu, select Pro-forma Invoice and then enter the Data Import menu from the top menu.
Crate a New Layout by pressing the plus sign (+).
Give it a name and press the Choose File button.
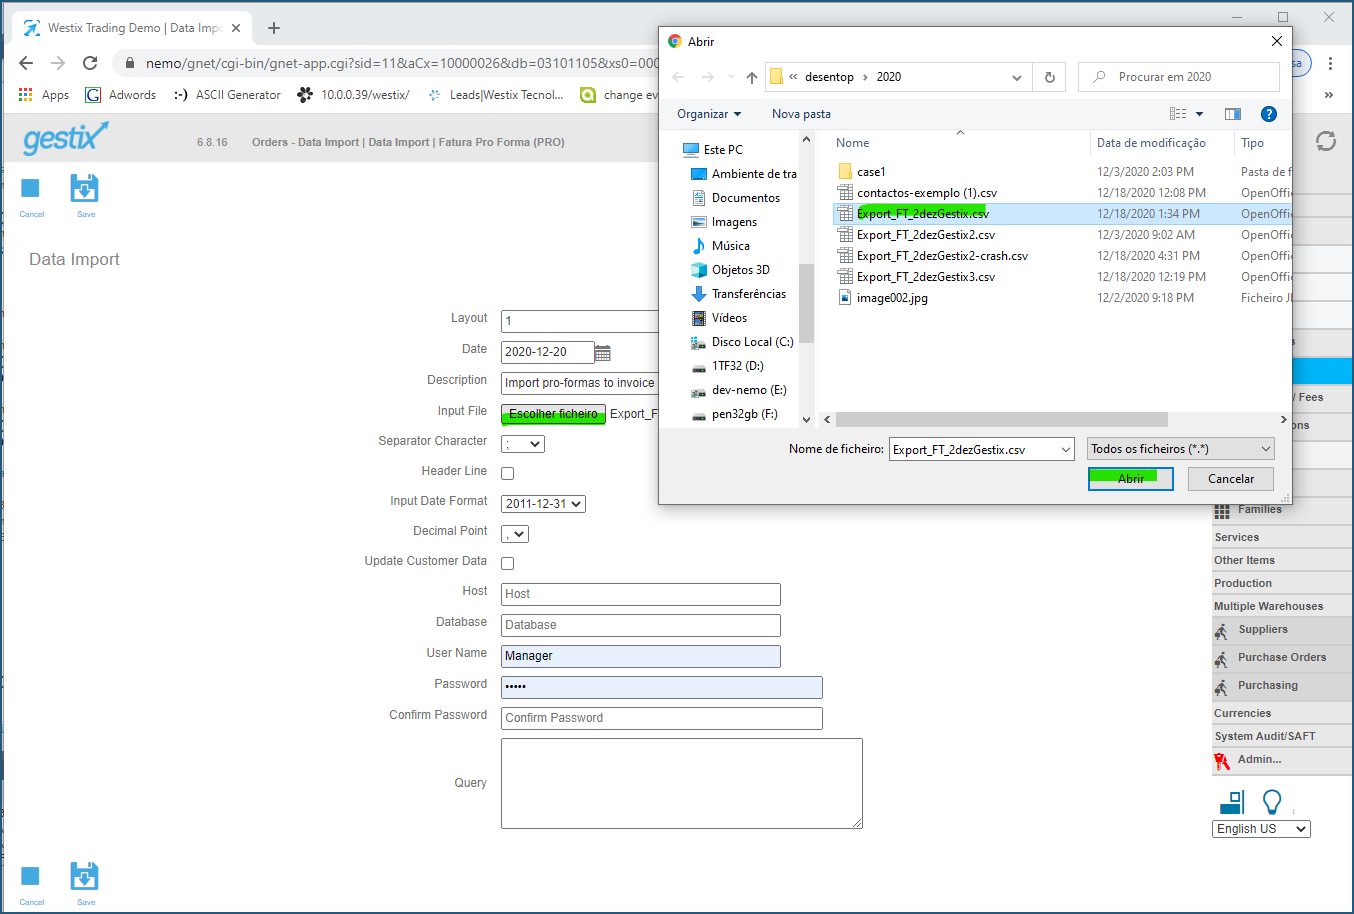
Then press Save.
Select the newly added layout by pressing the arrow next to its Description.
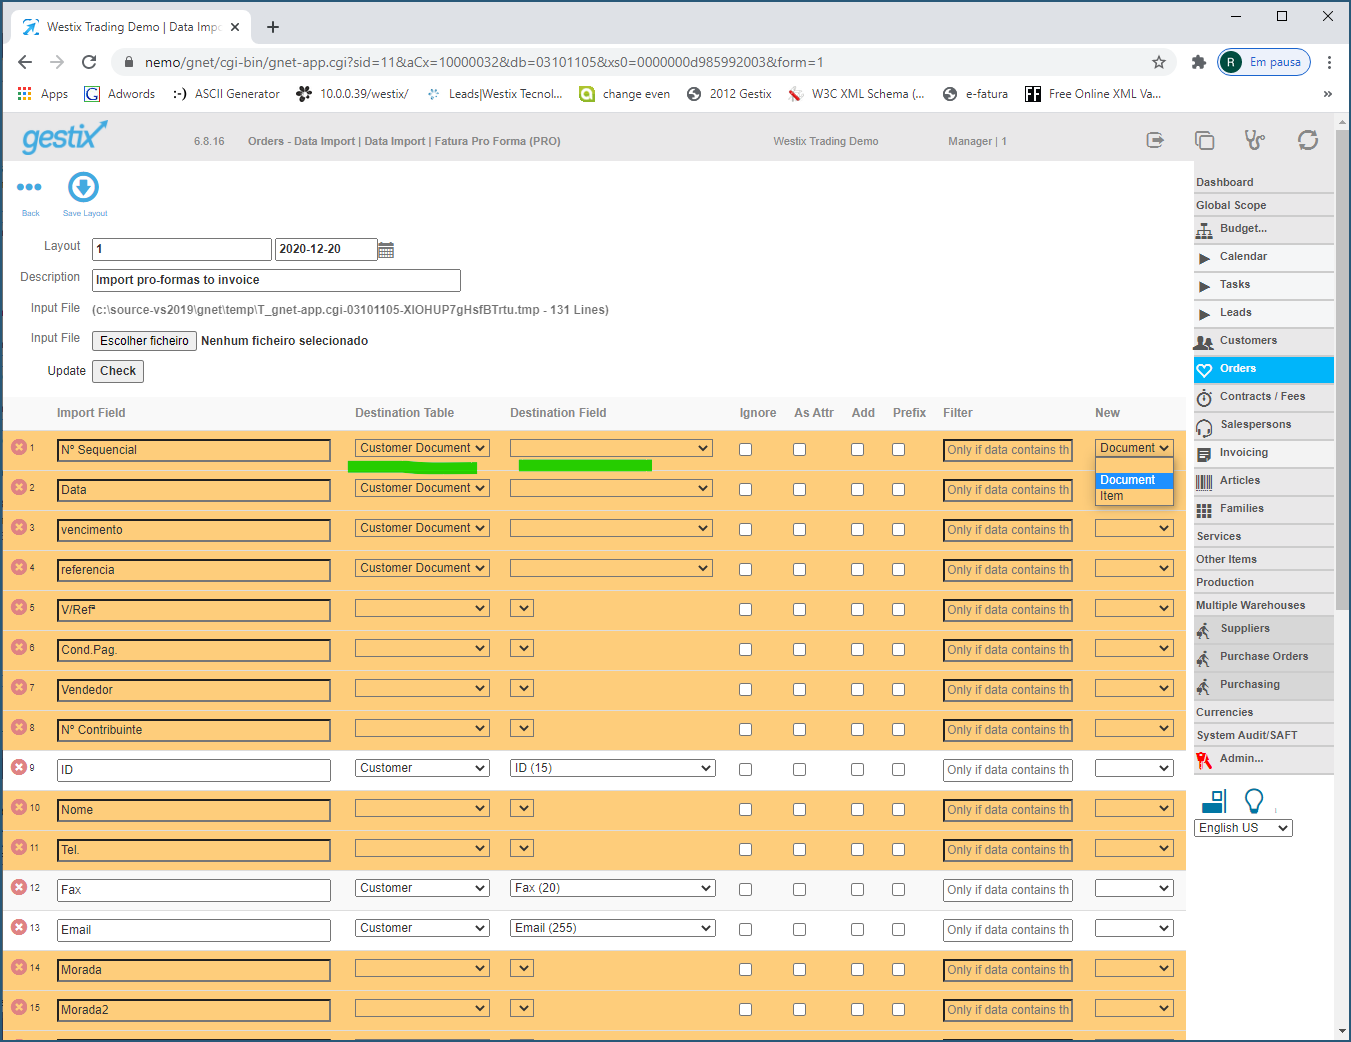
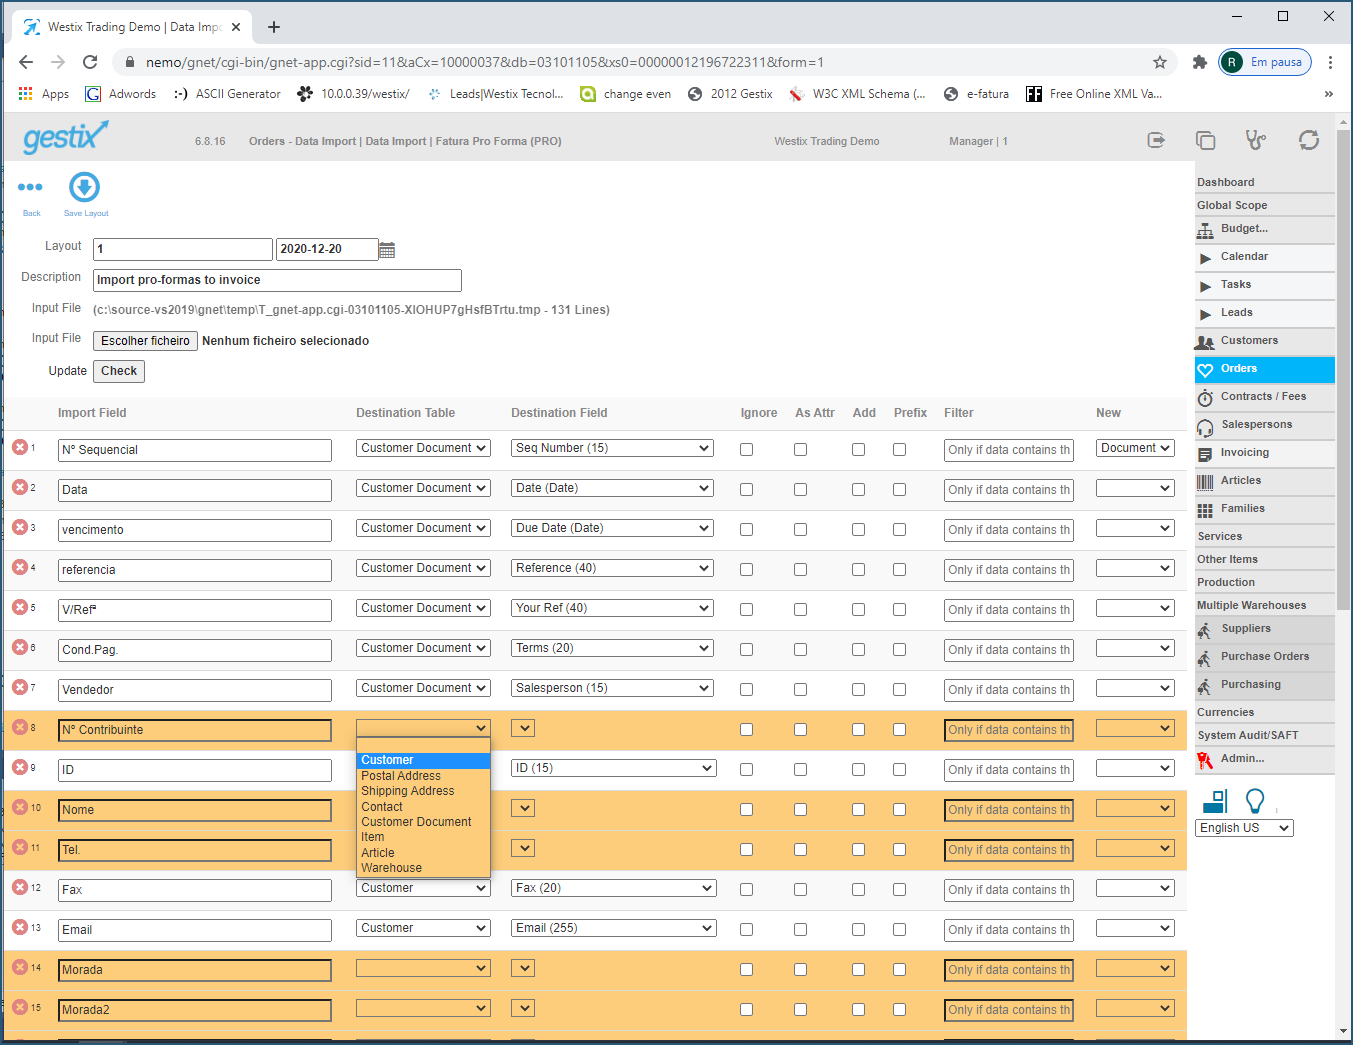
Go through each column and press Check as needed to update the view with your choices.
When ready, press the Test button to preview the results.
At this time the system is ready for the routinely operations.