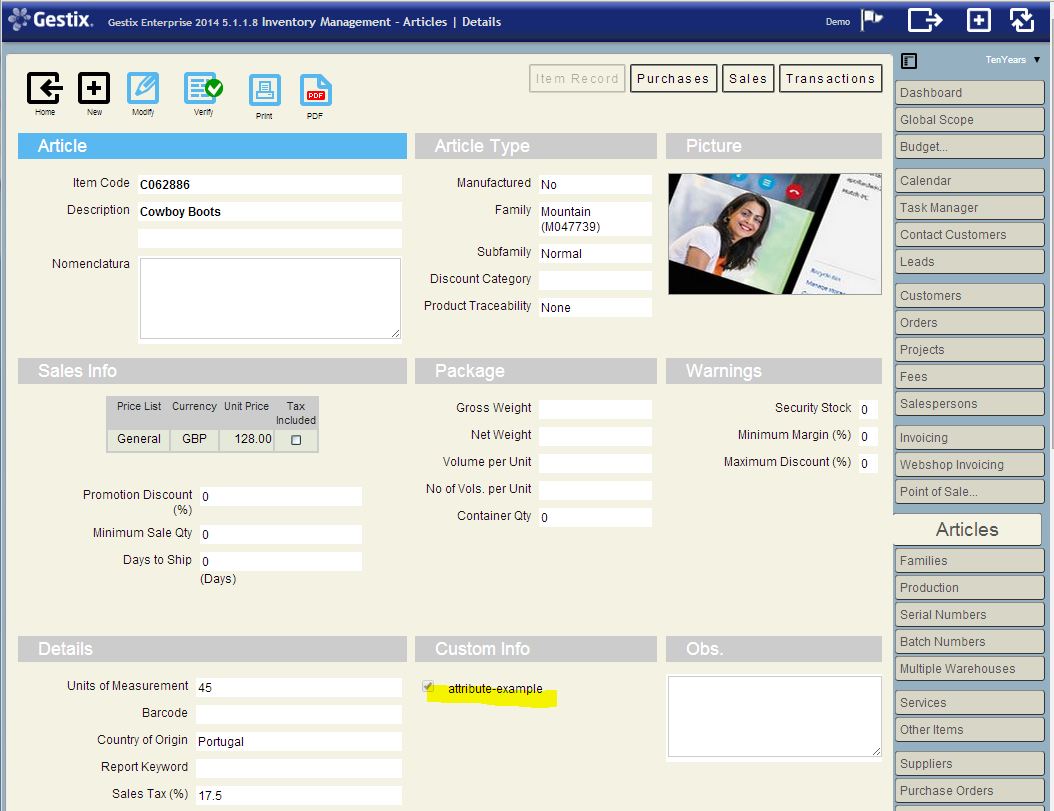
This example shows how to import data as Attributes assigned to each Article record. Attributes are user-defined fields that extend the ones included in the article record, and can be used in data-analysis and reporting.
Problem:
Transfer 600 thousand items into Gestix, with part-no, description, and condition, among other data that will be discarded.
The original file looks like this:

The PN field is to be stored as the Supplier’s Item Code. The value of the DESCRIPTION column goes to the field with the same name in the Gestix’s Article record, and the value of the MFG field goes to the Family field in Gestix.
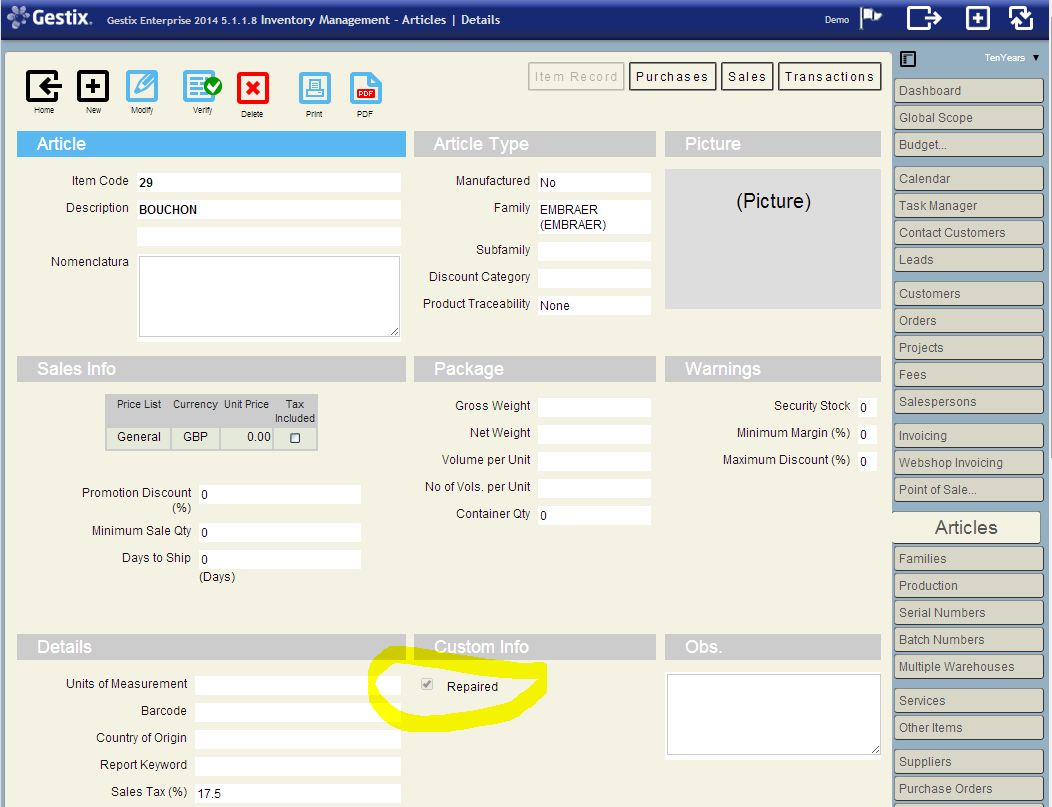
The field COND, representing the condition of the part (Factory New, Repaired, etc), is to be stored as an Attribute of the item. The possible values in this case will be:
FN – Factory New
RP – Repaired
AR – As Removed
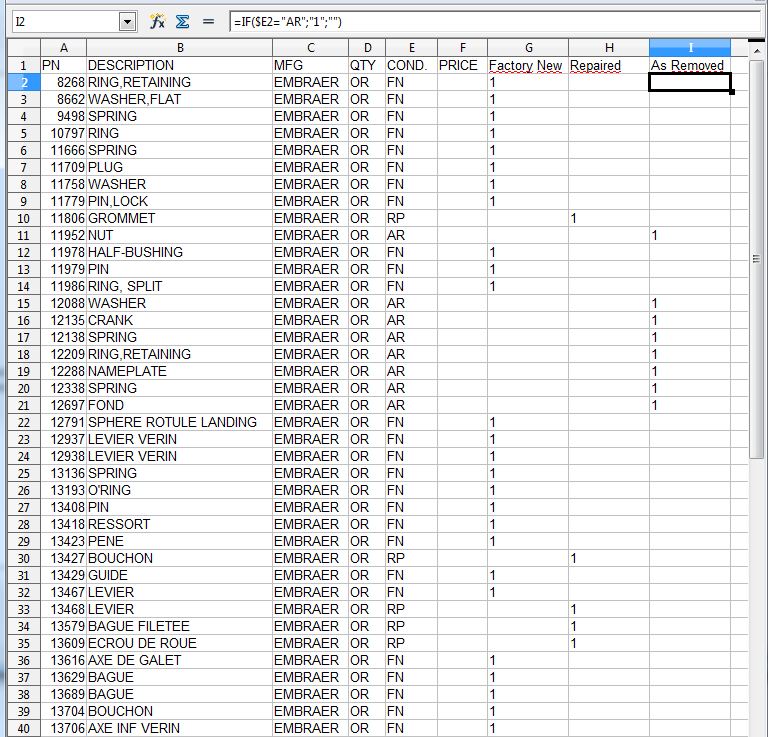
In order to assign attributes to articles using the Data Import menu of Gestix, the data has to be rearranged so each attributes comes in its own column in the worksheet. The column name will become the attribute name, and the column value for each item will be 1 if the attribute is to be assigned to the item, 0 or blank otherwise. We use the worksheet formulas to aid in this task, and the resulting, modified file looks like this:
Then, after saving this file as CSV again, open it from the Gestix, Articles, Data Import menu. Add a new layout for this CSV file (tap the plus sign +).

Then, save it and open it by clicking the row or the small arrow in it.
Finally, set the destination table and fields for each import field (each import field corresponds to a column in the input worksheet). Press the update button between steps, whenever necessary.
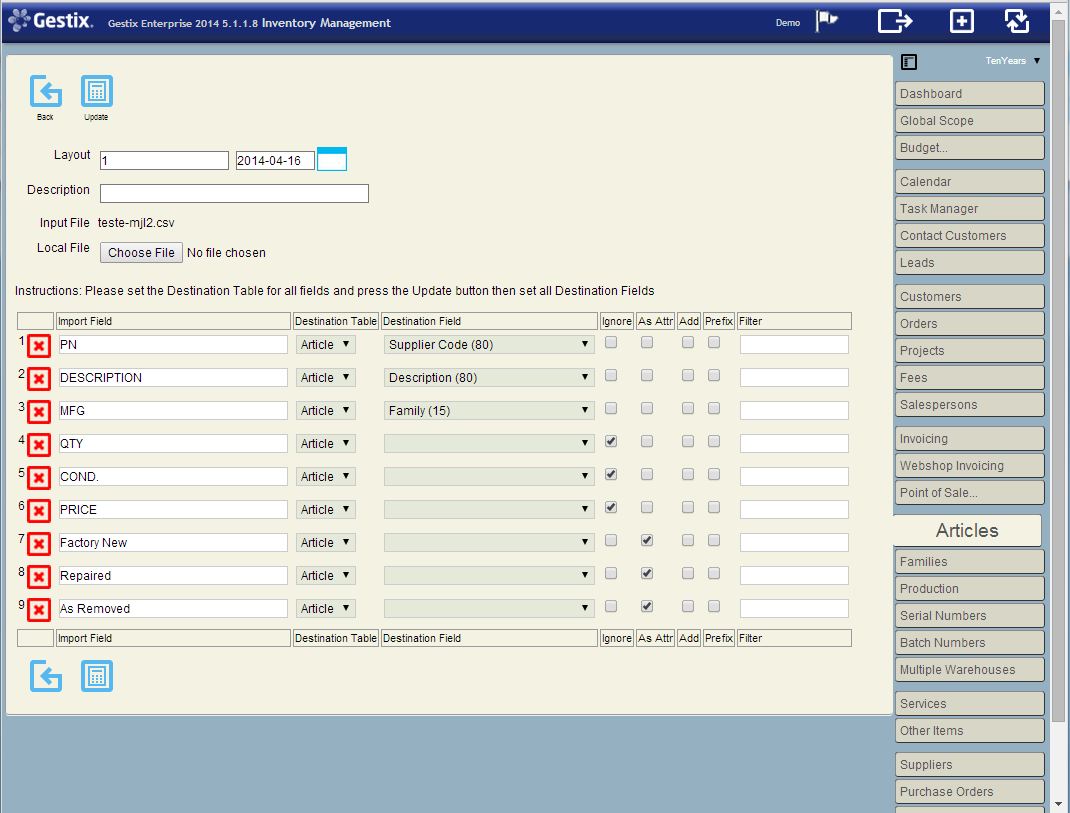
Then press the Test button to preview the results.
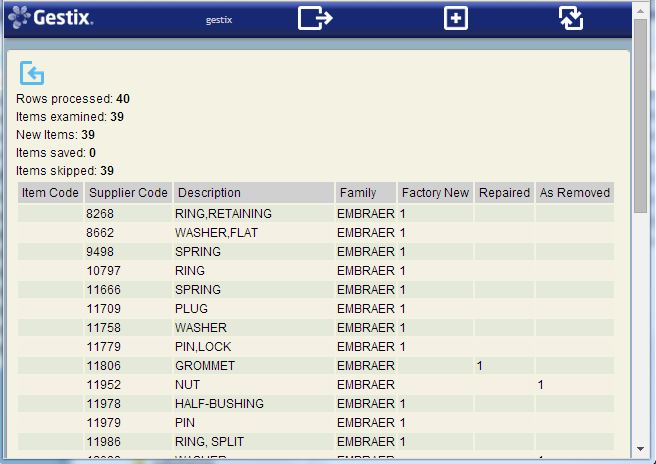
If the data displayed look correct, go back and press the Import button. Then check the results. Here we listed the new family EMBRAER, and checked it was alright.

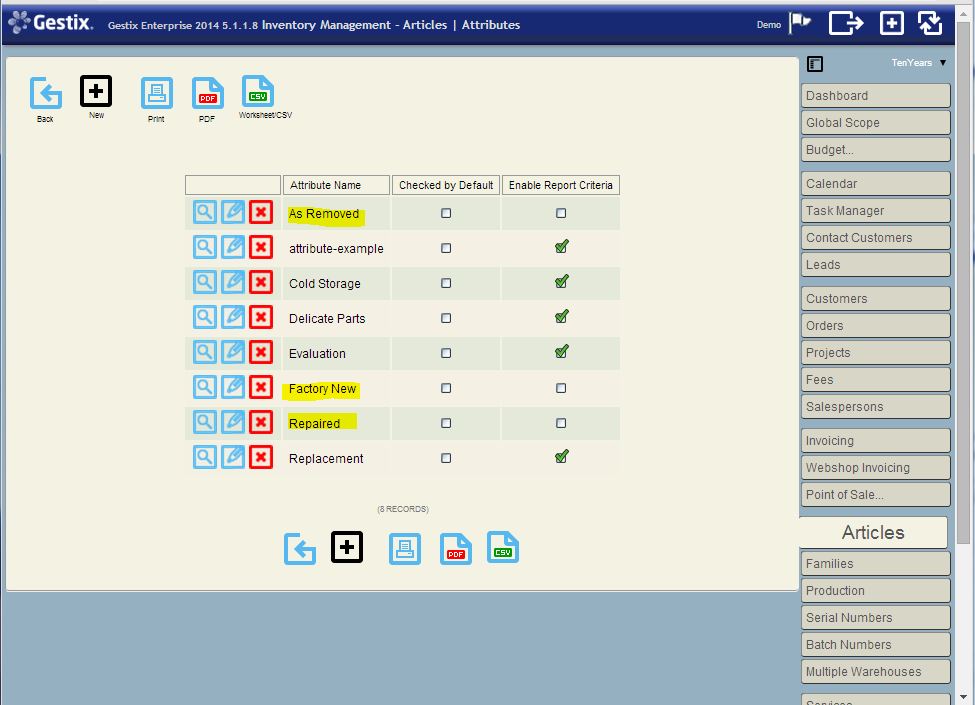
The Attributes menu display the new attributes just created during the data import process.
And it’s done.